Adding a custom domain name
One of Linkila's core functionality is to allow users to create branded short URLs with their own domain names. In this article we'll go over the steps to add your own domain name to use with short URLs on Linkila.
Note
This guide does not apply to WordPress integration, JavaScript redirection or generated gateway files.
Note
If you need any help setting up your domain name, please reach out to us. We love helping people set up domain names :).
Prerequisites
In order to add your own domain name to use with short URLs, you'll need access to the DNS settings of the domain name you want to add.
Steps to add domain name
Step 1
Visit: https://app.linkila.com/domain
Step 2
Click the Add domain button located towards the top right of page:

Step 3
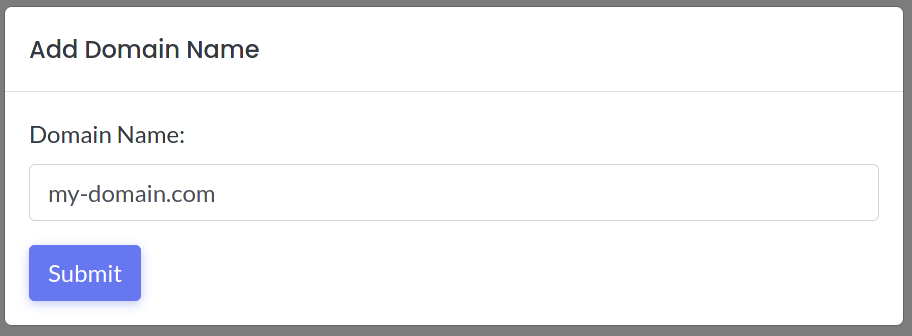
On the popup, type the domain name you want to add, and click Submit

Step 4 - Setup DNS records
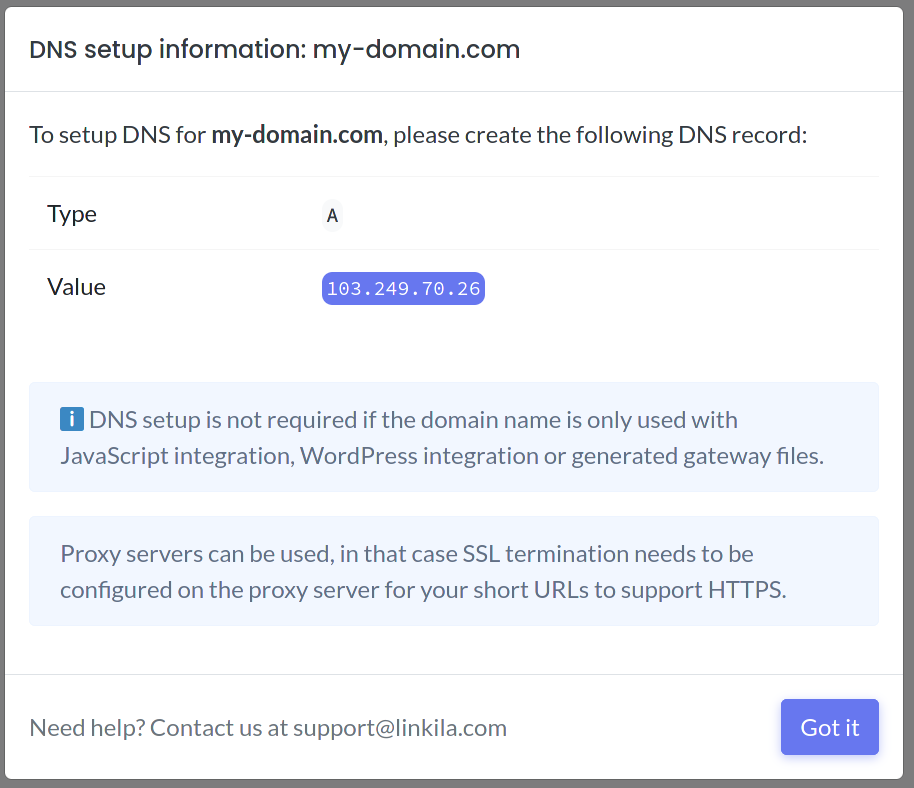
A new popup will appear with instructions on how to setup the DNS records for the domain

The type and value of the desired DNS record for your specific domain can be different from what's shown here on the image, please use the DNS type and value for your specific domain name.
The process to setup a DNS record will be dependent on the DNS provider your domain name is using. If you are not sure, searching for How to add DNS records on <your_dns_provider> should give you the information you need. Feel free to send us an email at [email protected] if you need assistance.
Note
You can use your own proxy server or a CDN provider such as CloudFlare to proxy the traffic of your short URLs, in that case you'll need to setup SSL support on the proxy server if you need your URLs to support HTTPS.
[Optional] Step 5 - Verify ownership
If you are not using a proxy server to handle HTTPS and would like to add HTTPS support to your short URLs, it is required to verify the ownership of your domain name.
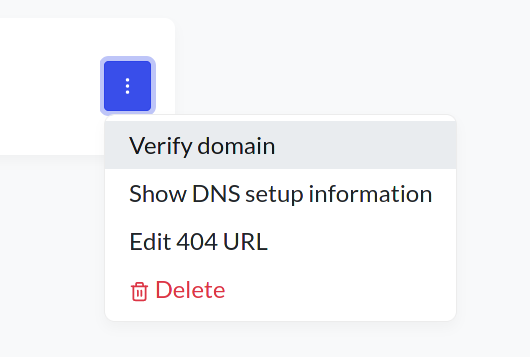
To verify your domain, click the tripple-dot menu on the domain card, and select Verify-domain.

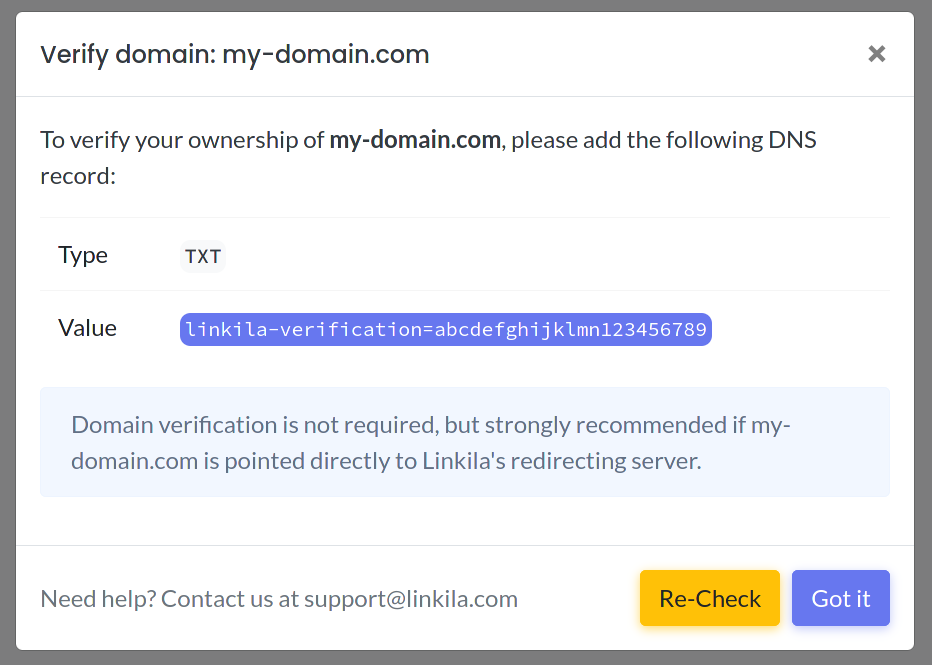
A popup will appear with instructions on how to setup the DNS record to verify the ownership of the domain.

Follow a similar process as the last step, and add the TXT record with the value shown for your domain name. Once that's done, you can click the Re-check button to confirm the verification. Most DNS providers should register the changes within a minute, but some may take longer, this which case you may wait a few minutes and then click the Re-check button.
HTTPS support will be added to your domain once the domain is verified. The first few visits will be slower for domain names that are just verified due to the fact we need to request new security certificates for these domain names. The speed should go back to normal shortly after.